Example: How to Detect Objects
In this example, we will show you how to run Object Detection on the Leo Rover mobile robot.
What to expect?
After completing this tutorial, your rover should be able to recognize 91 objects from the COCO dataset (listed here), and display an image with drawn bounding boxes around the detected objects.
Prerequisites
List of components
- Any computer which you can connect to the rover via
ssh. - Stock Leo Rover
Software integration
To complete those steps, you need to connect to the rover's network first, and then log in using ssh (both covered in prerequisites).
Our neural network model was converted to TensorFlow Lite, so you need to install it on your rover too. As you shouldn't install python packages system-wide, we will create virtual environment and install the module inside it:
sudo apt install python3-pip python3-venv
python3 -m venv env_ros --system-site-packages
source env_ros/bin/activate
pip3 install ai-edge-litert
Installing using apt
You can install the package using apt by typing on the rover:
sudo apt install ros-${ROS_DISTRO}-leo-examples
Then you just need to source the ROS workspace:
source /opt/ros/${ROS_DISTRO}/setup.bash
Building from source
You can also get all needed software from our leo_examples github repository. You need to clone it on the rover in the ros workspace directory (if there's no such a directory, first go through the ROS Development tutorial):
cd ~/ros_ws/src
git clone https://github.com/LeoRover/leo_examples-ros2.git
Now, you need to install all the dependencies for the downloaded packages:
cd ~/ros_ws
sudo apt update
rosdep update
rosdep install --from-paths src -ir
Then, you need to source the directory and build the packages:
cd ~/ros_ws
source install/setup.bash
colcon build
If your installation went without any errors, then you have successfully installed required software.
Examples
Using given models
Running the object detection node is very simple. First, you need to connect to
the rover via ssh. Once you are logged in to the rover, you can launch the
node using ros2 launch command:
ros2 launch leo_example_object_detection detector.launch.xml
The given launch file has a few arguments:
camera_topic- the name of the topic with theImagemessages (you can specify it if you have changed basic setup on the rover or maybe have two cameras)labels- a path to the file with labels for the model (a parameter provided in case you want to try other neural network models that were trained on other datasets thanCOCO)model- a path to neural network model for object detection (the models given by us are in themodelsdirectory of theleo_example_object_detectionpackage)config_file- a path to the yaml file with defined colors for given labels.
- Every argument has default value, so when launching the node, you don't need
to specify any of them. Those are for your use, if you want to change the
default functionality. You can see the default values with command:
ros2 launch leo_example_object_detection detector.launch.xml -s
- You can create your own
config_file, or modify the one provided by us. What matters is that the file you provide has specific structure - it must start withlabelskeyword, and each consecutive line must be of formkey: value, wherekeyis a label specified in labels file for the model, andvalueis a list of 3 integers representing RGB values, that will be used for displaying given object. For each label, that is not defined in this file, there is a default color, so you don't need to define all the labels. Here is our example configuration which you can use as a base for your label coloring:The indentation for each defined label is important - they all need to be inlabels_config.yamllabels:person: [255, 0, 0]chair: [0, 0, 255]backpack: [0, 255, 0]cell_phone: [153, 0, 153]labels"namespace".
So, with some arguments your line can look like this:
ros2 launch leo_example_object_detection detector.launch.xml config_file:=<absolute path to your config yaml file>
To be able to display the output of the model you need to have ROS installed on your computer and be connected to the rover's network.
If you don't have ROS installed, you can follow this guide:
Being connected and having ROS installed, next you have to source the ROS
workspace:
source /opt/ros/${ROS_DISTRO}/setup.bash
Now just run rqt on your computer:
rqt
There, you need to run two things:
Image View(Plugins -> Visualization -> Image View)Dynamic Reconfigure(Plugins -> Configuration -> Dynamic Reconfigure)
In Image View, from the topic drop down choose /detections/compressed - this
is the processed image with drawn detections on it. In Dynamic Reconfigure,
choose object_detector.
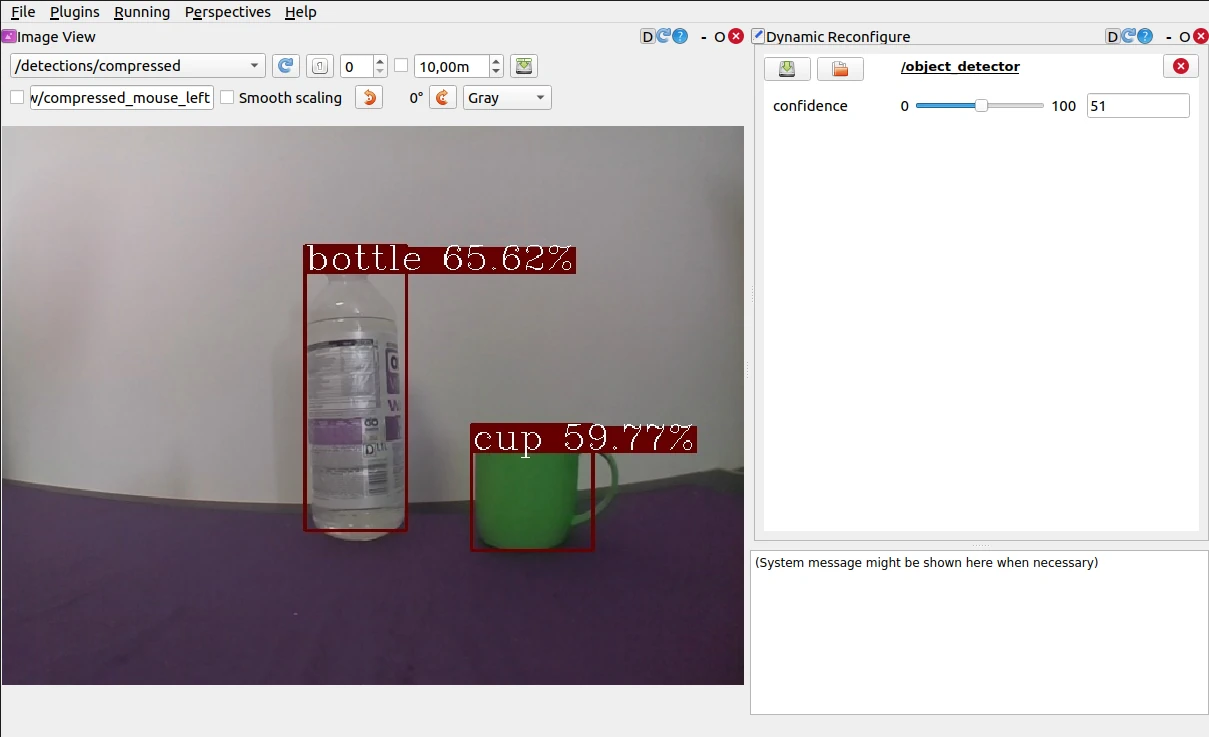
You should see something like this:
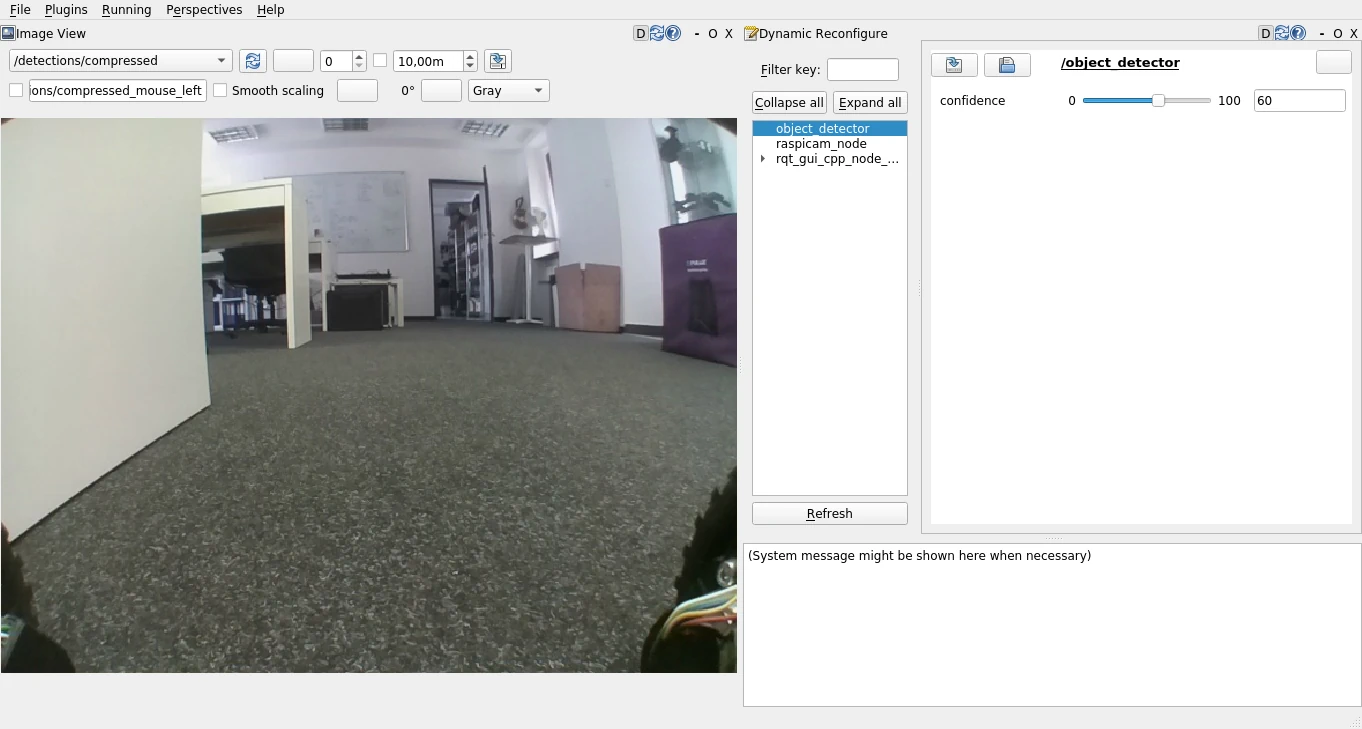
In the Parameter Reconfigure window you are able to change the node's
parameters values. The only important one is confidence - it specifies the
confidence threshold for the neural network guesses (only the detections with
confidence higher than the specified will be displayed). You can change the
value to see how the detections change.
Place objects inside the view of the camera and if they are a part of the dataset, and the algorithm recognizes them with enough confidence, boxes around the item and a text description will appear.
Adding models of your choice
It's possible to run the node with your models (either made from scratch or found on the internet). To launch the node with your files, you have the launch arguments. You can specify their values to make the node use your files.
If you provide model, that was trained on other dataset than COCO, then you will need to give the node labels for your model too.
Not every object detection model will be compatible with our node. The models that we have provided in the models directory of the package, are pretrained, single-shot detector models, converted to TensorFlow Lite from the TensorFlow repository.
So if you want the model of your choice to be compatible with our node, the model needs to follow the same output signature as the TF models.
What next?
After completing this tutorial, you can try other examples from the leo_examples repository (line follower and follow Aruco Marker), or try other integration from our site.